Customize a Built-in Widget
Learn how to modify and enhance Built-In Widgets using the Widget Builder, allowing you to tailor them to better fit your specific needs.
Customize a Built-in Widget
In the next sections, you will find examples of how to customize and extend the functionality of widgets provided by the Widget Builder.
Customizing the Meal Plan Widget
This guide shows how to customize the Meal Plan widget template by adding a dropdown to select a mensa location and a navigation to switch between days.
Steps to make a copy of the Built-In Widget template
-
Go to the Widget Builder Built-In Widgets
Select the
Meal Planwidget template.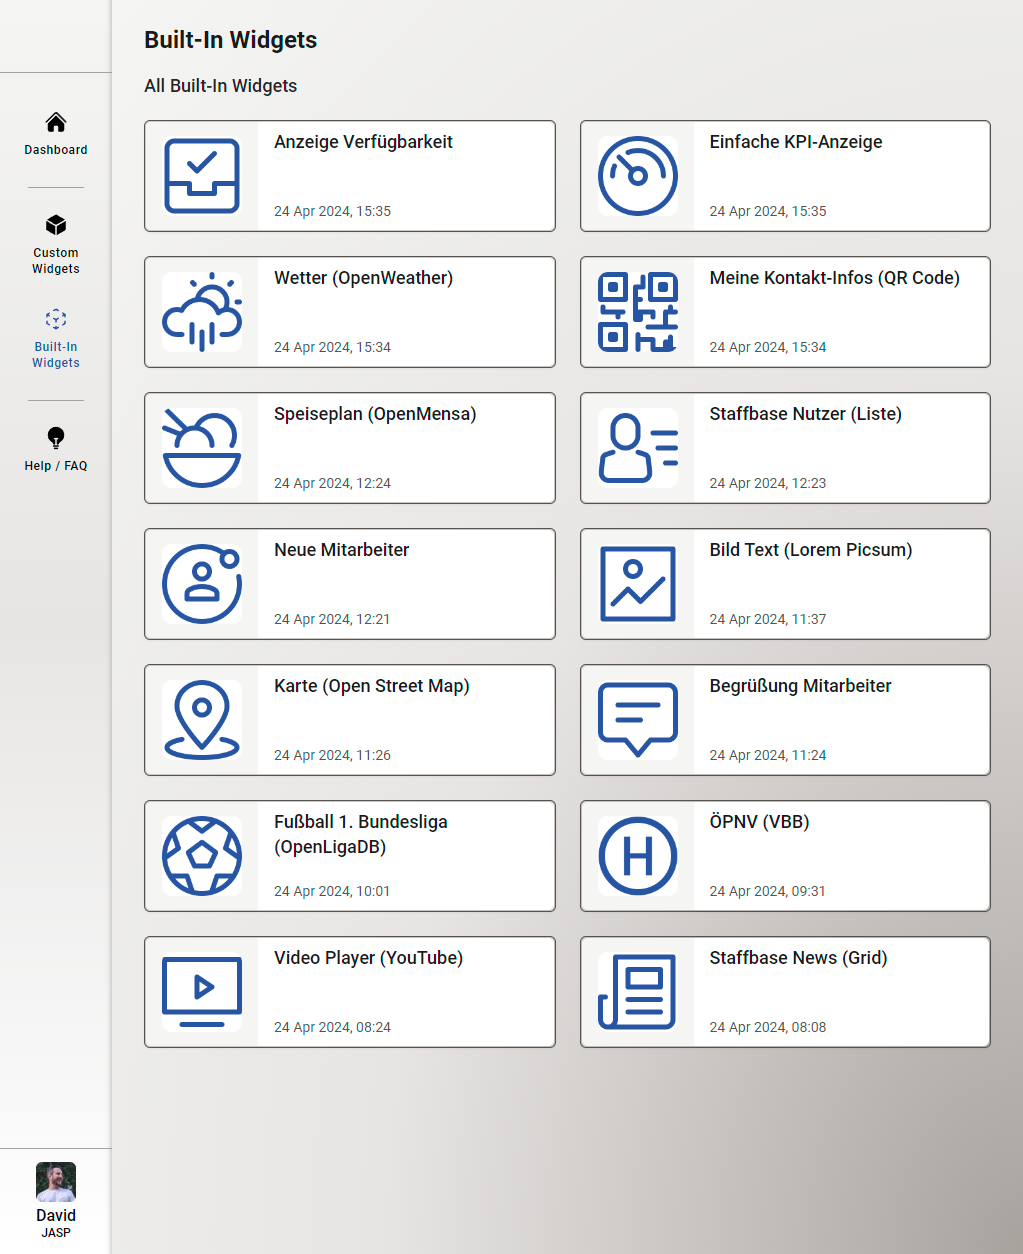
Widget Builder Built-In Widgets -
Create a Custom Widget
Create a Custom Widget based on the
Meal Planwidget template.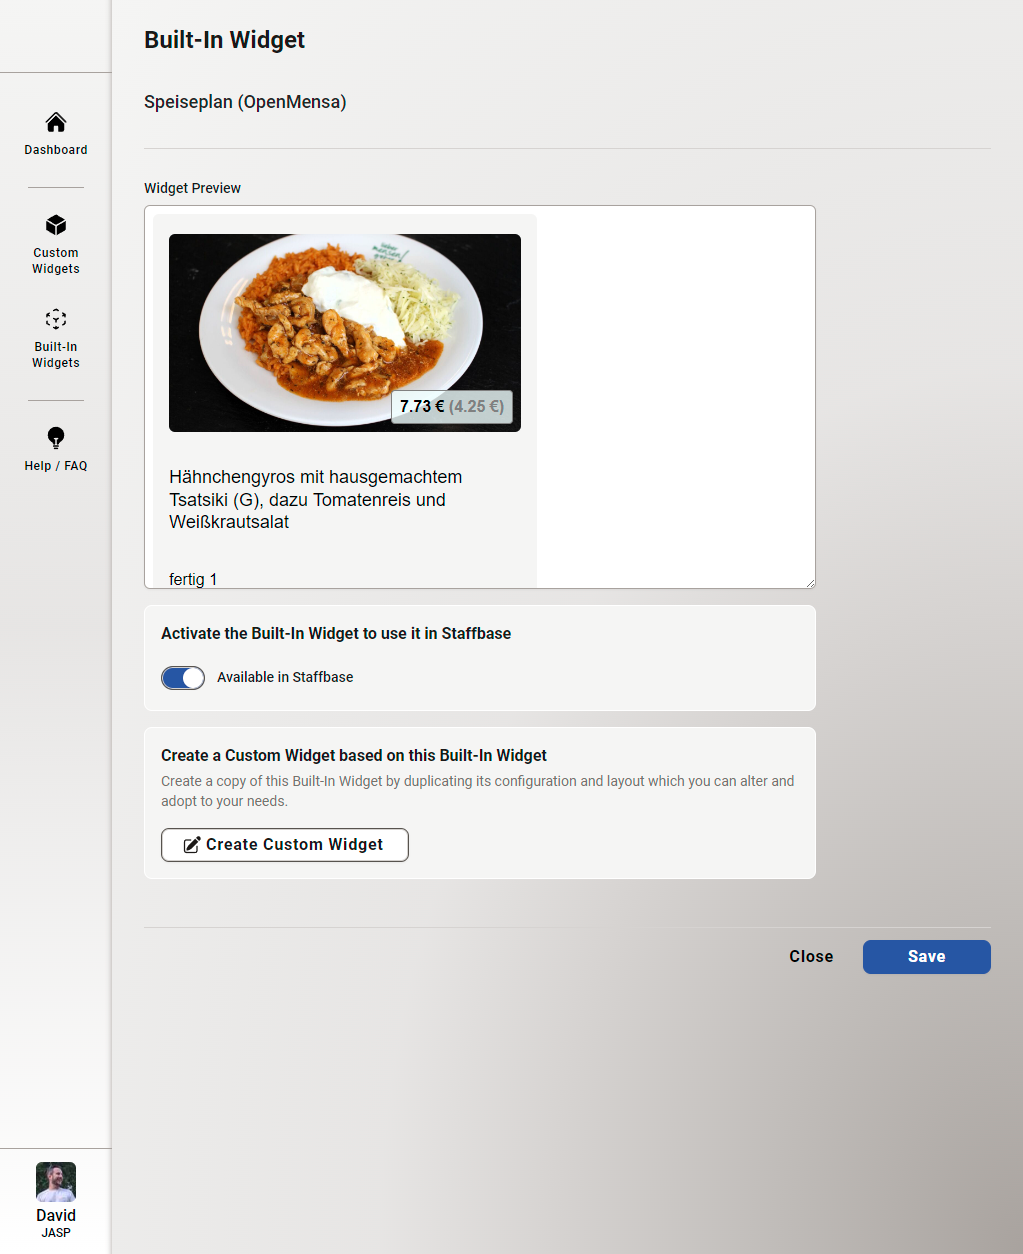
Built-in "Meal Plan" Widget -
Edit the Custom Widget
Edit the Custom Widget created based on the
Meal Planwidget template.
Edit Custom Widget - General Tab -
API Request Configuration
The
Meal Planwidget uses the OpenMensa API to fetch meal plan data. The API request is configured using a dynamic handlebar variable to fetch data for the current day.https://api.studentenwerk-dresden.de/openmensa/v2/canteens/4/days/{{datetime output_format="yyyy-MM-dd"}}/meals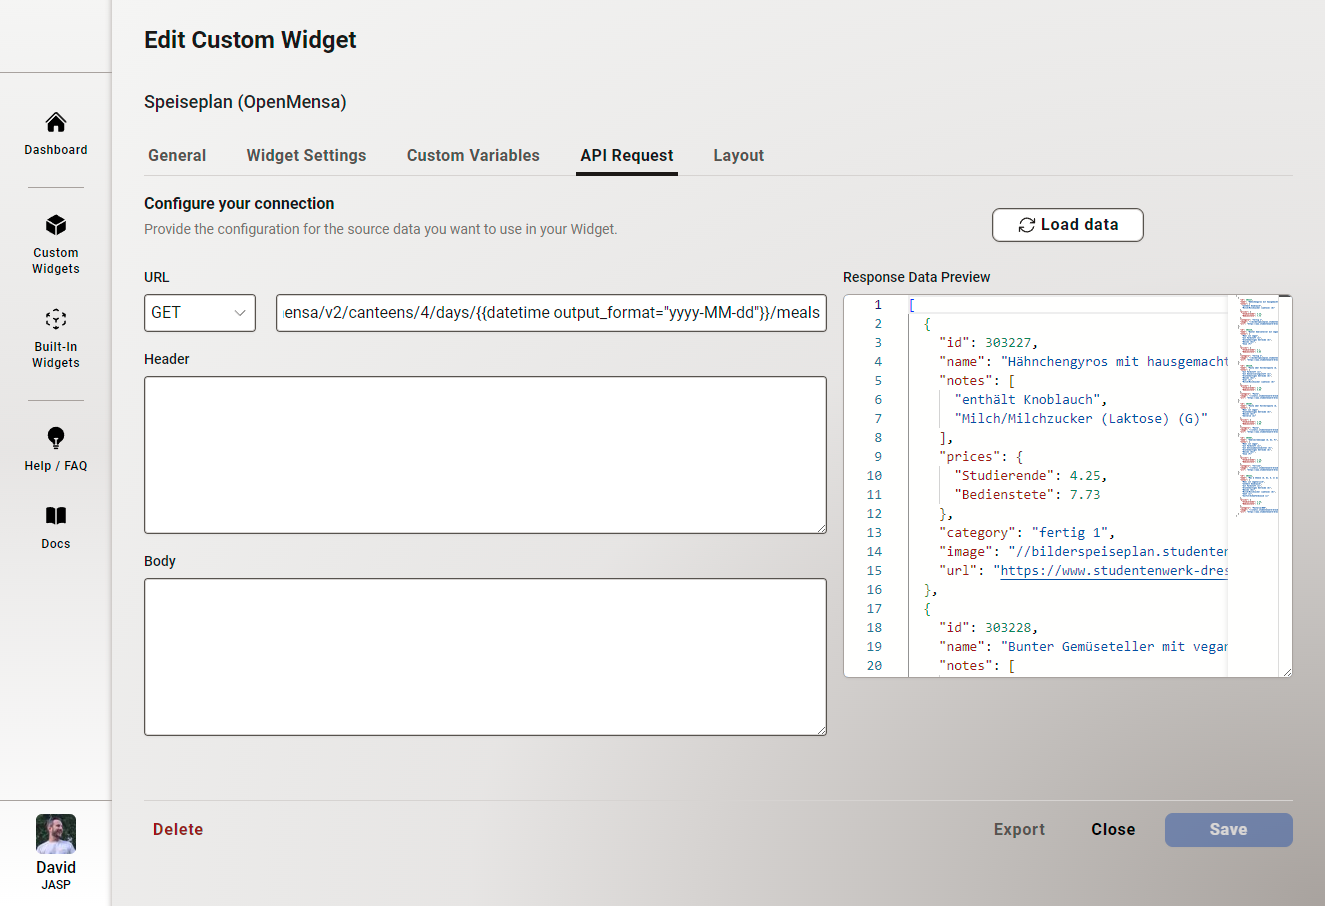
Edit Custom Widget - API Request Tab -
Layout Editor
The
Meal Planwidget layout is created using HTML, Handlebars, and Tailwind CSS. The layout editor provides a live preview of the widget and the data fetched from the API.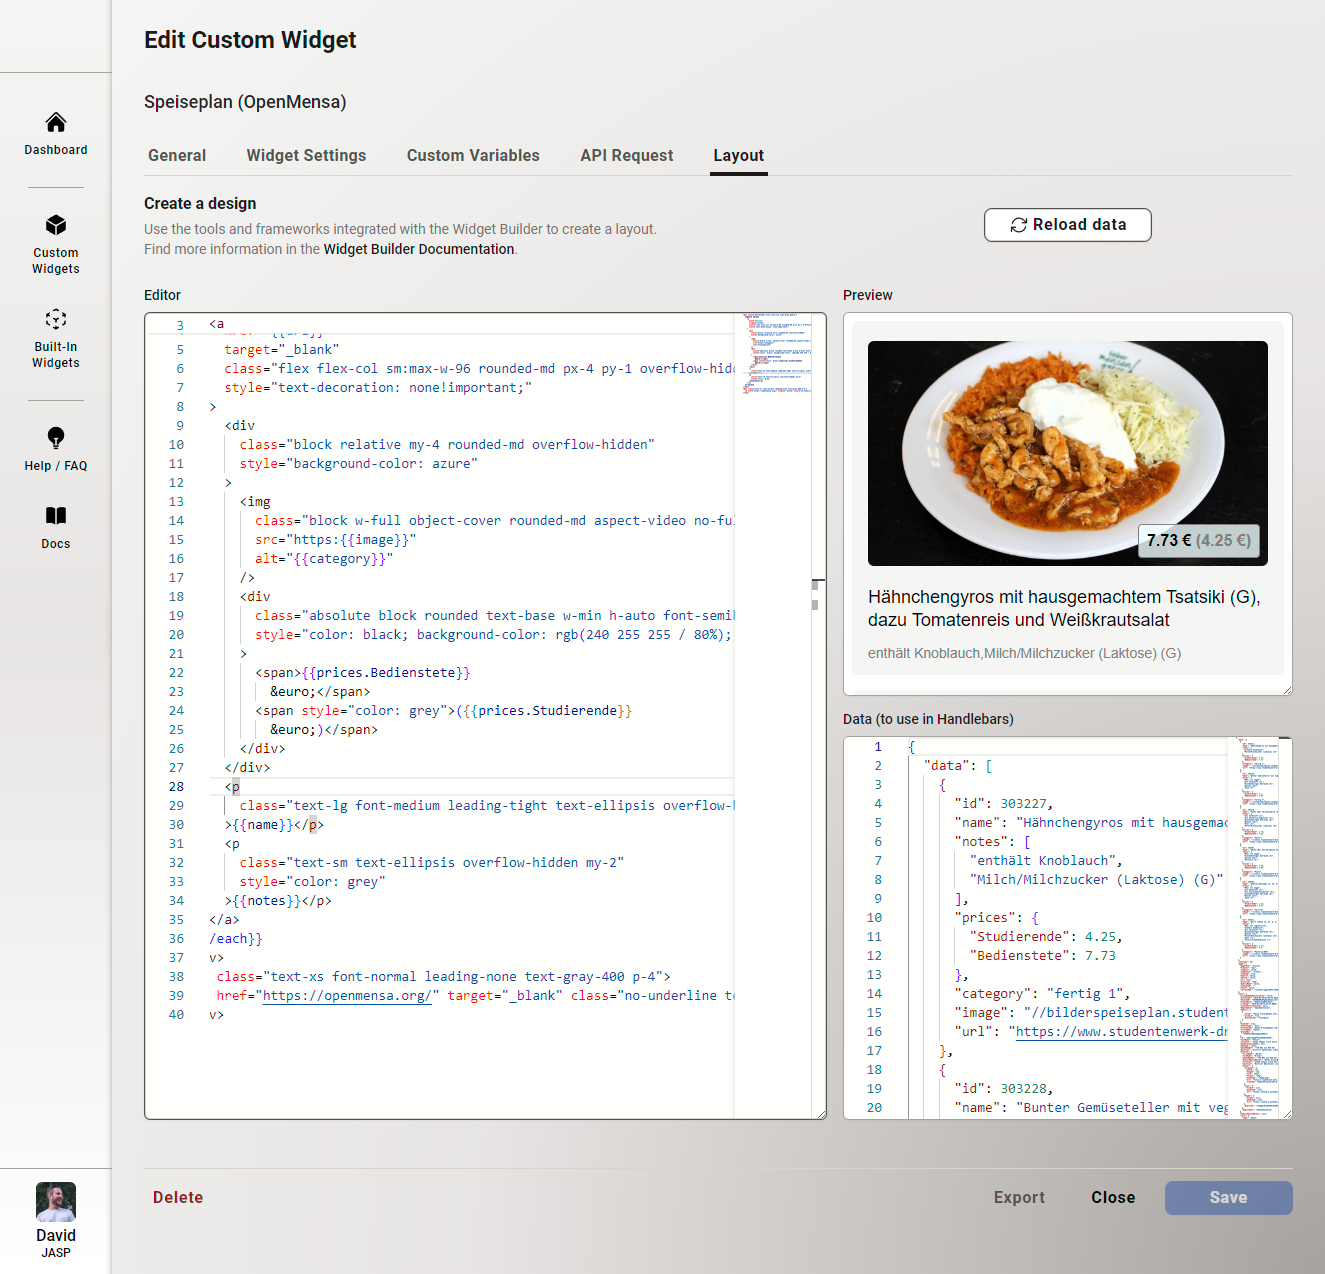
Edit Custom Widget - Layout Tab -
Rename and Save the Widget
Rename the Custom Widget to
Meal Planand save it.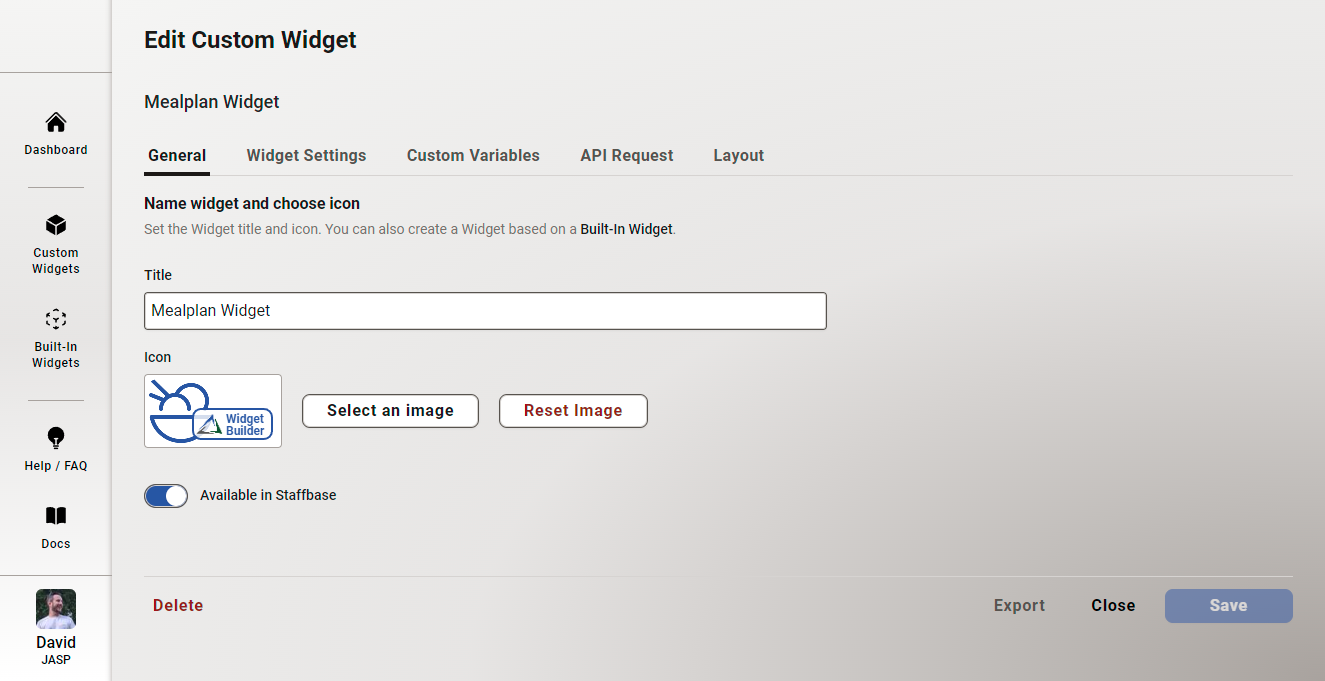
Edit Custom Widget - General Tab
Steps to add a custom dropdown
-
Add a Dropdown for Mensa Location
Add a dropdown to select a
Mensa Location, allowing editors to choose a specific location when the widget is added to a Staffbase page.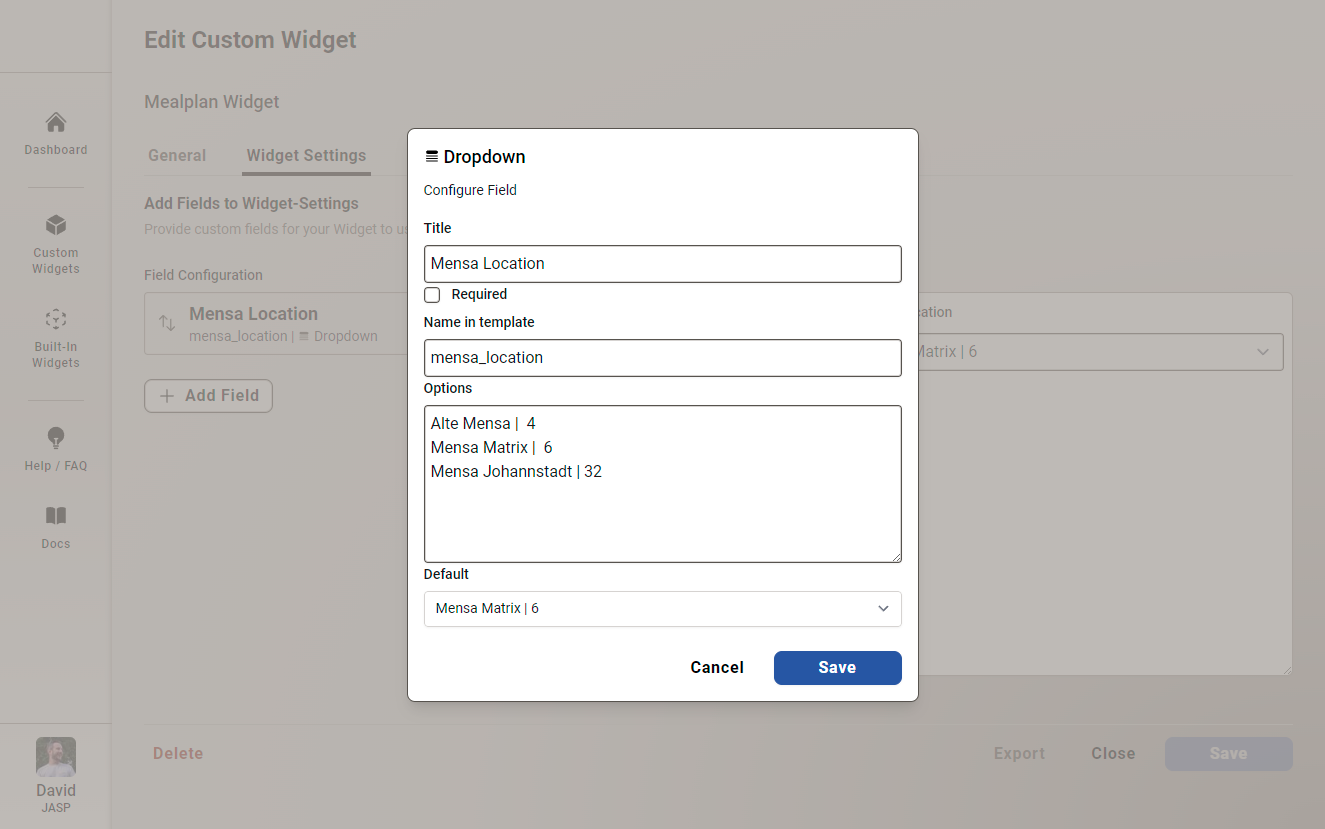
Edit Custom Widget - Widget Settings Tab -
Update API Request with Mensa Location
Use the
Mensa Locationdropdown to update the API request to fetch meal plan data for the selected location.https://api.studentenwerk-dresden.de/openmensa/v2/canteens/{{substring settings.mensa_location -2}}/days/{{datetime output_format="yyyy-MM-dd"}}/mealsWe are using a
substringHandlebars helper to extract theIDof theMensa locationfrom the widget settings dropdown value.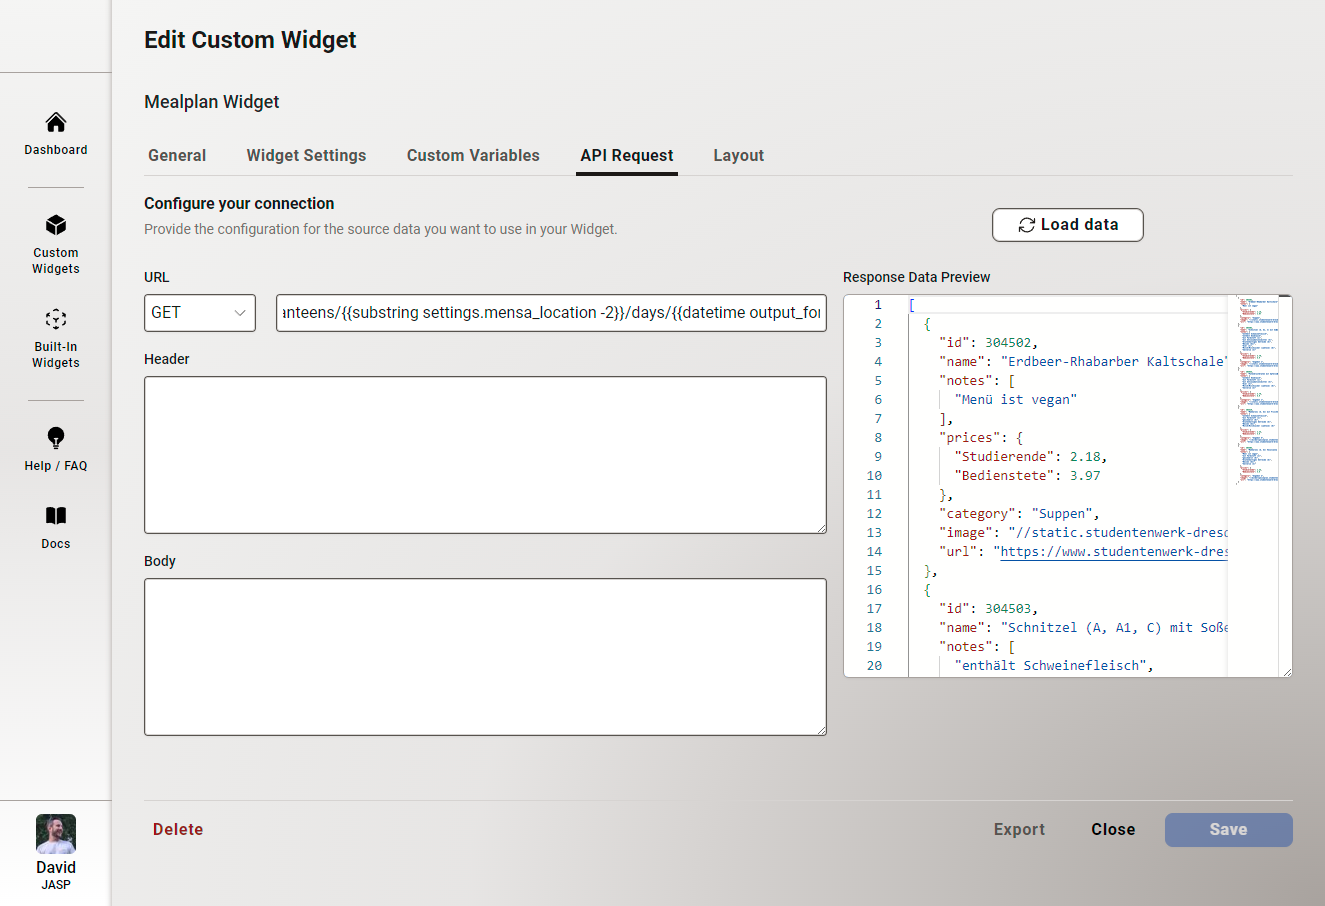
Edit Custom Widget - API Request Tab -
Add the Widget to a Staffbase Page
Add the
Meal Planwidget to a Staffbase page by selecting it from the add widget menu.
Staffbase Page - Edit Mode -
Select Mensa Location
Choose a
Mensalocation from the dropdown to display the meal plan for the selected location.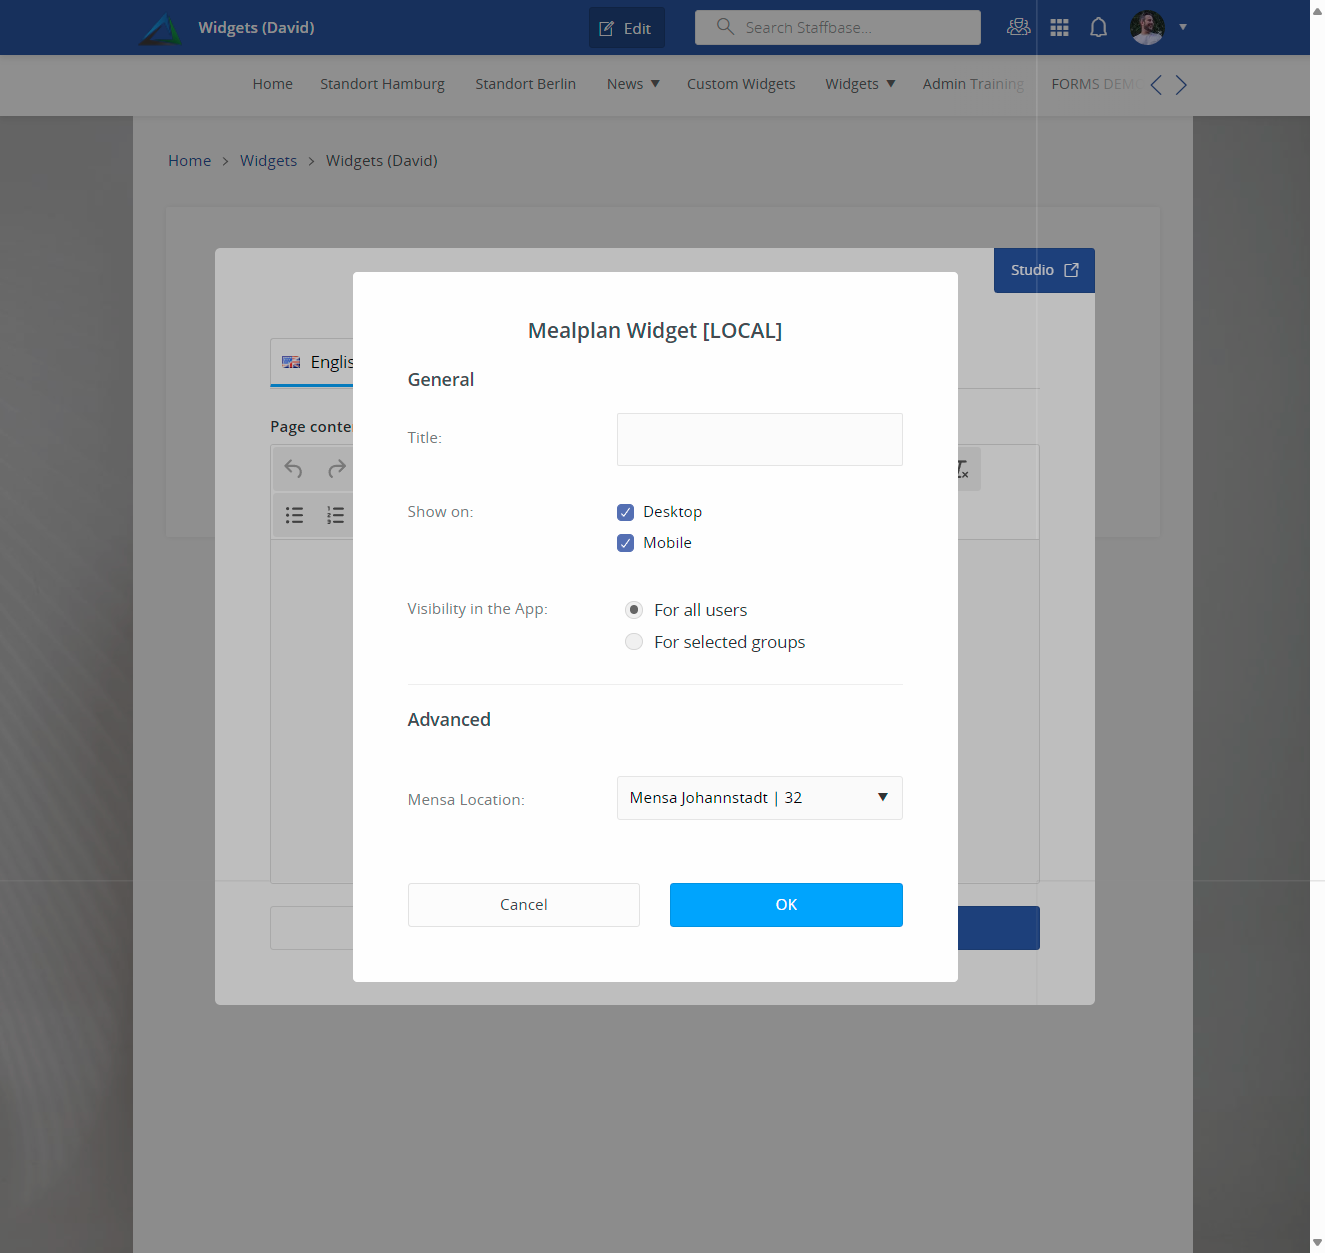
Staffbase Page - Edit Mode -
View the Widget
The
Meal Planwidget displays the meal plan for the selected location for all users viewing the Staffbase page.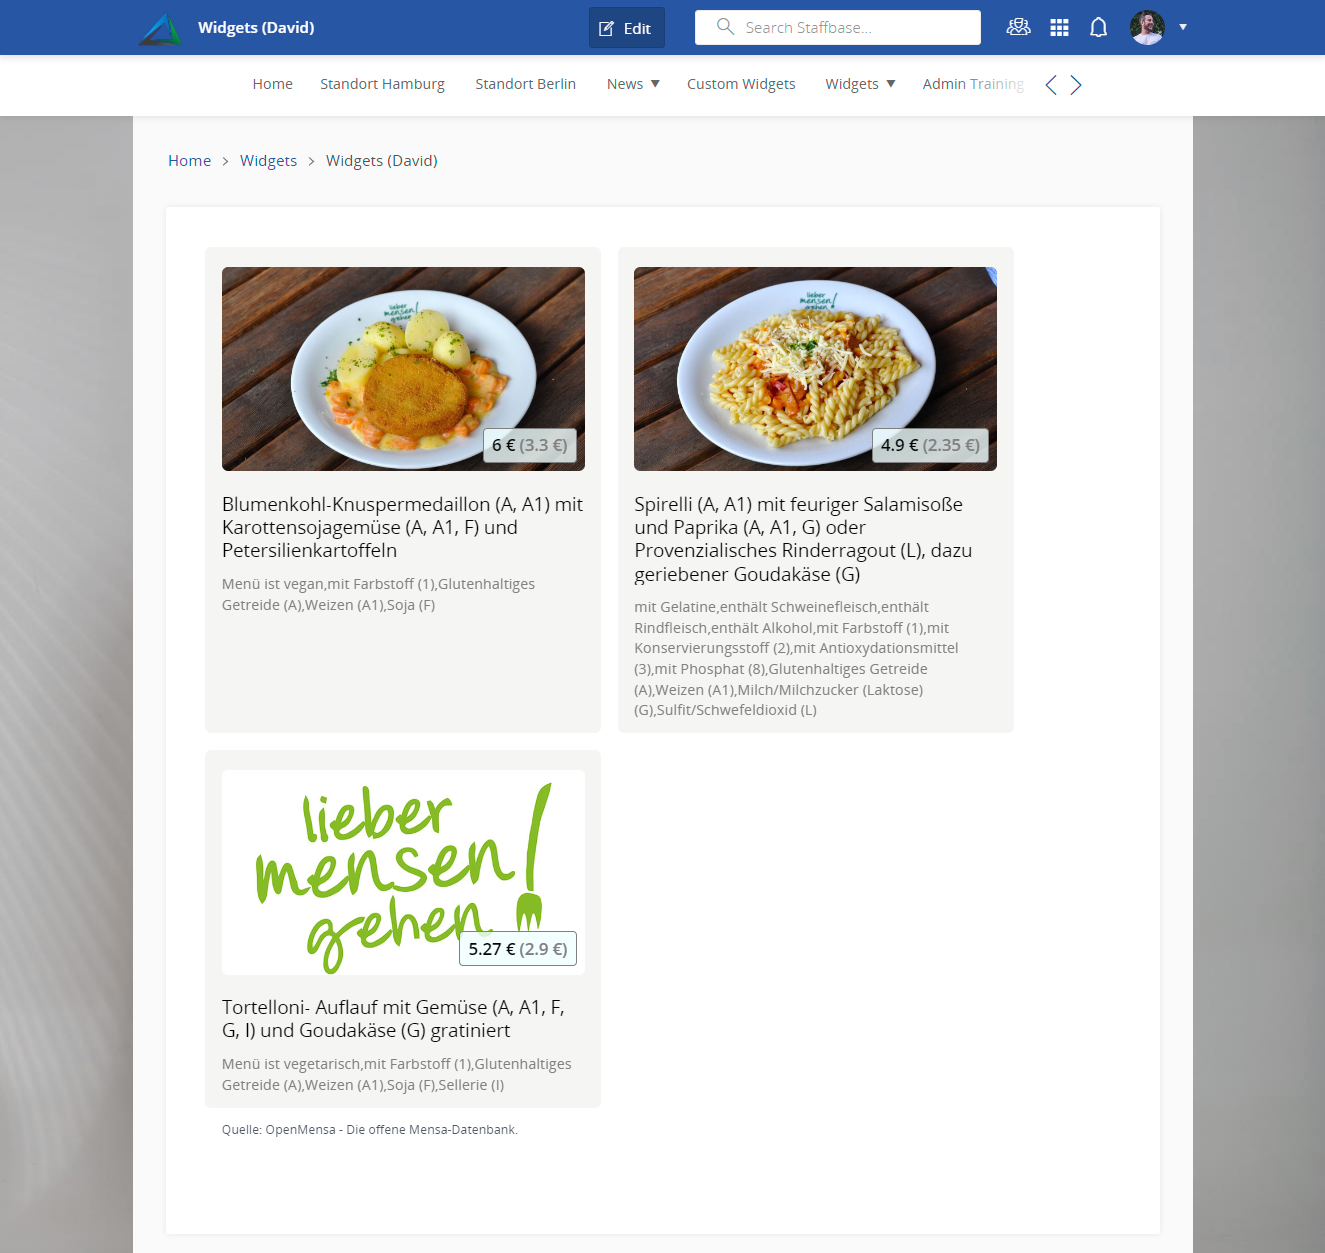
Staffbase Page - View Mode
Steps to add a date navigation
-
Add Date Navigation
Add a date navigation to the
Meal Planwidget to allow users to switch between days. Create a customcurrent_datevariable of typeDateto have the current date available.
Edit Custom Widget - Custom Variables Tab -
Update API Request with Date Navigation
Update the API request to use the
current_datevariable.https://api.studentenwerk-dresden.de/openmensa/v2/canteens/{{substring settings.mensa_location -2}}/days/{{datetime from_var=variables.current_date output_format="yyyy-MM-dd"}}/mealsWe are updating the
datetimeHandlebars helper Handlebars helper to use thecurrent_datevariable as the date reference.
Edit Custom Widget - API Request Tab -
Create Date Navigation Layout
Create a date navigation layout using HTML, Handlebars, and Tailwind CSS to allow users to switch between days.
<div class="flex gap-2 mb-4 sm:max-w-96 center">
<div>
<button
class="block p-0 m-0 w-10 h-10 rounded-full border border-solid border-neutral-200 bg-neutral-100 text-neutral-600 cursor-pointer hover:bg-neutral-200"
onclick="setVariable('current_date', '{{datetime from_var=variables.current_date sub_days="1" to_iso=true}}', true)"
title="Previous">
<span class="inline-block text-2xl font-semibold leading-none h-7">«</span>
</button>
</div>
<div class="w-full">
<button
class="block p-0 m-0 w-full h-10 rounded-xl border border-solid border-neutral-200 bg-neutral-100 text-neutral-600 cursor-pointer hover:bg-neutral-200"
onclick="setVariable('current_date', '{{datetime to_iso=true}}', true)"
title="Today">
<span class="inline-block text-2xl font-semibold leading-none h-7">
{{#if (eq (datetime output_format="yyyy-MM-dd") (datetime from_var=variables.current_date output_format="yyyy-MM-dd"))}}
Today
{{else}}
{{datetime from_var=variables.current_date output_format="dd MMMM yyyy"}}
{{/if}}
</span>
</button>
</div>
<div>
<button
class="block p-0 m-0 w-10 h-10 rounded-full border border-solid border-neutral-200 bg-neutral-100 text-neutral-600 cursor-pointer hover:bg-neutral-200"
onclick="setVariable('current_date', '{{datetime from_var=variables.current_date add_days="1" to_iso=true}}', true)"
title="Next">
<span class="inline-block text-2xl font-semibold leading-none h-7">»</span>
</button>
</div>
</div>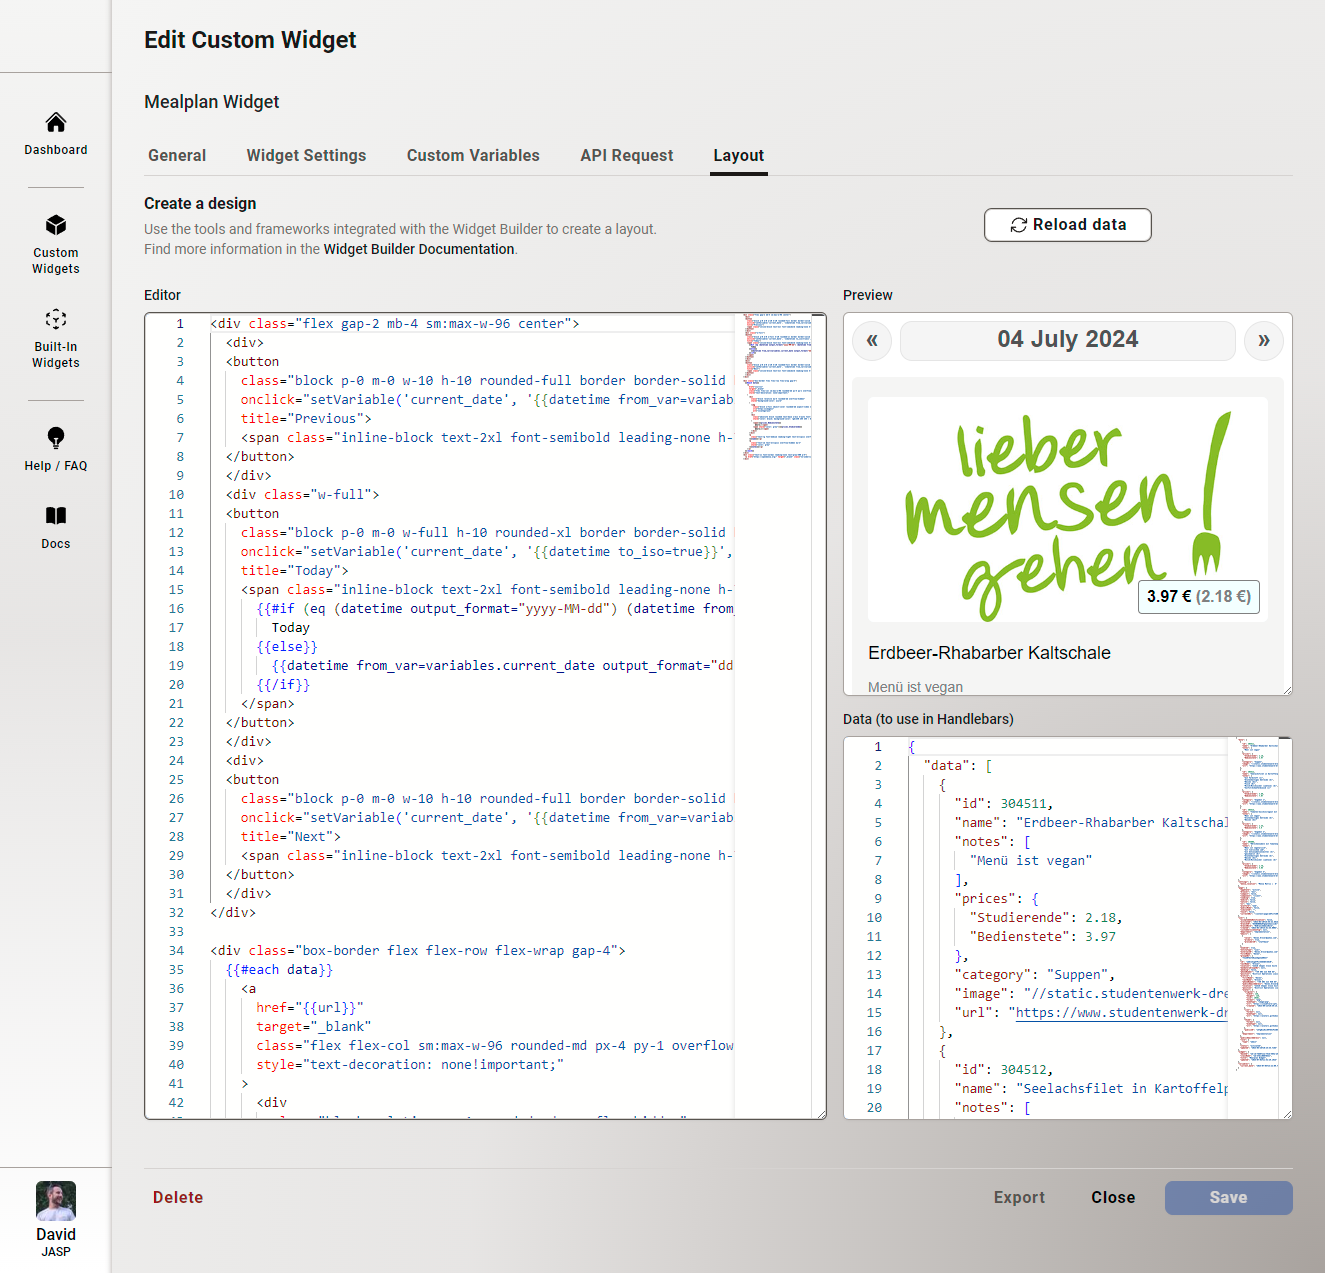
Edit Custom Widget - Layout Tab -
Refresh the Staffbase Page
The
Meal Planwidget will now display the meal plan for the selected location and date. Refresh the Staffbase page to see the changes, there is no need to re-add the widget to the page. All changes are automatically applied to the widget.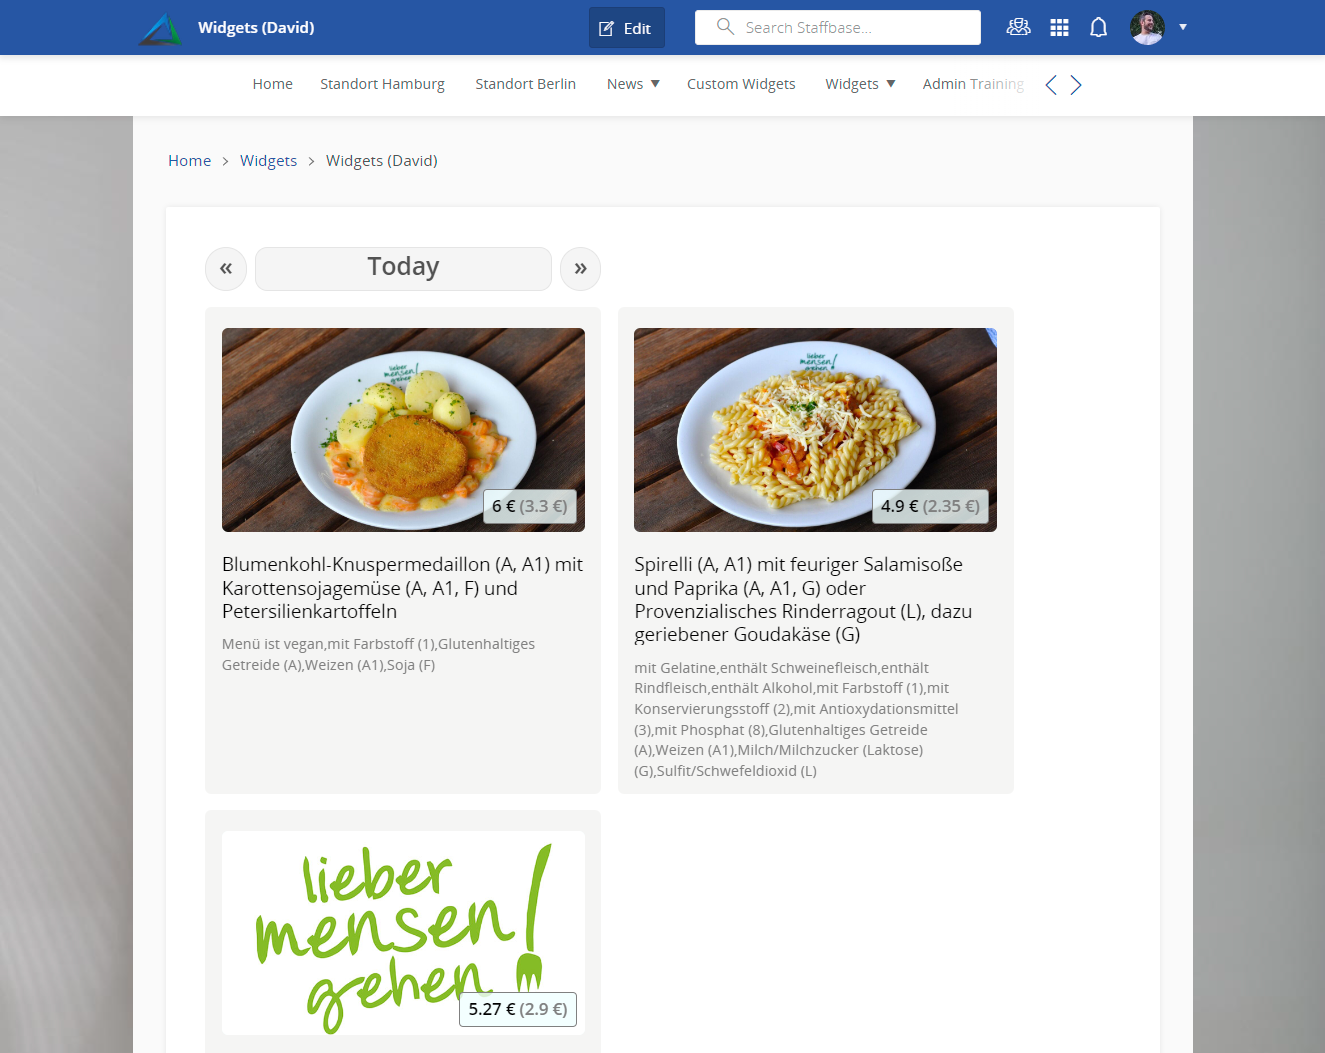
Staffbase Page - View Mode